Exchange 2013
Generate CSR in Exchange 2013
-
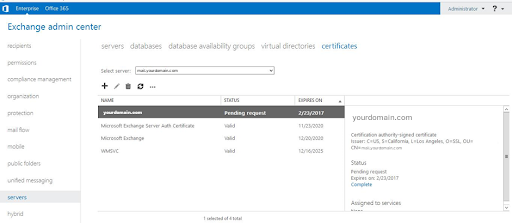
Open the Exchange Administration Center in your web browser usually done via https://localhost/ecp) and navigate to Servers -> Certificates.
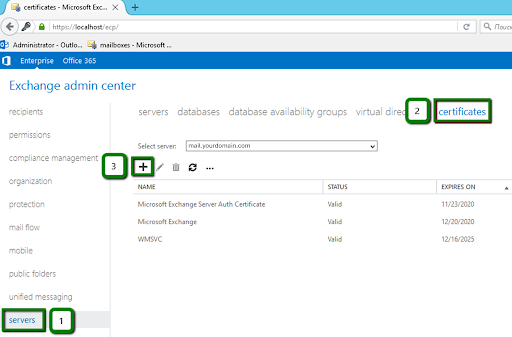
Managing certificates in the Exchange Administration Center. -
Click the “+” button to start the new Exchange certificate wizard. Select “Create a request for a certificate from a certification authority” and click Next to continue.
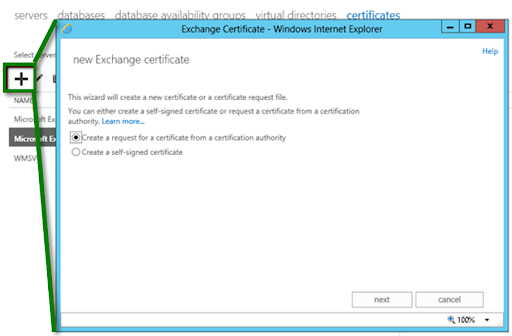
Start the new Exchange certificate wizard -
At the next step, enter a Friendly name for your certificate that you will remember in the future. The Friendly name is rather an identifier for you. It is recommended entering your domain name as a friendly name in order not to get confused and click Next to continue.
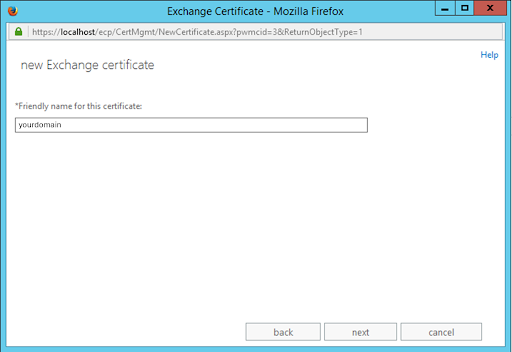
Give the certificate a friendly name -
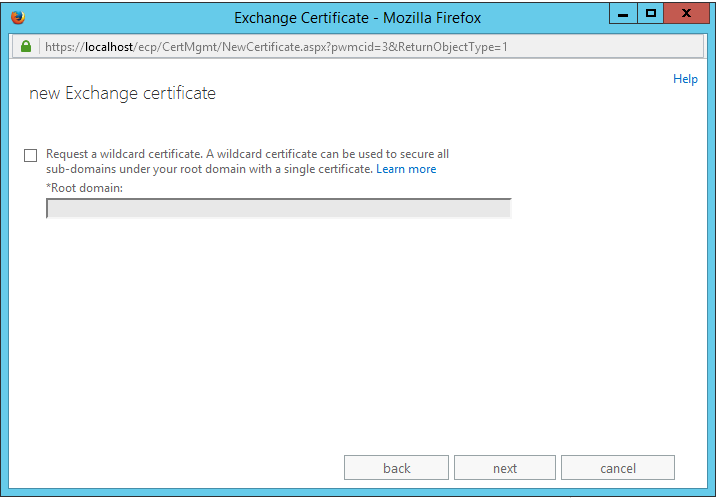
If you have purchased Wildcard SSL or Multi-Domain Wildcard SSL certificate, you should select (check) below checkbox and specify the base domain name. Verify that you enter wildcard domain name as *.yourdomain.com in text box.
-
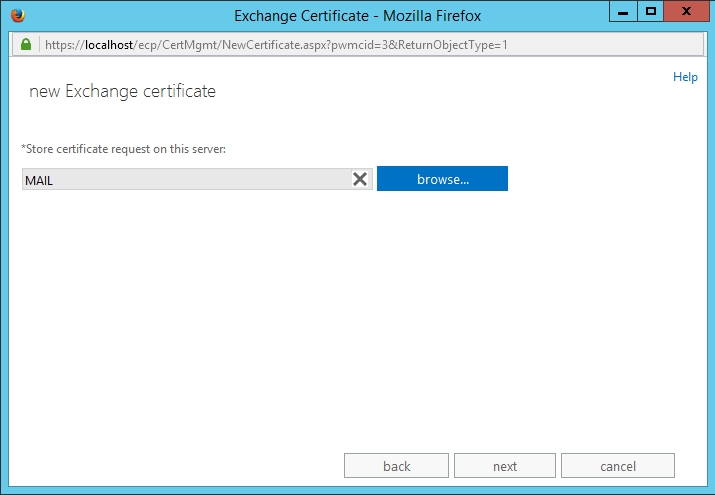
Click Browse and choose an Exchange server to store the certificate request (this is the server that will hold the pending certificate request while you wait for the certificate to be issued). Click Next to continue.
-
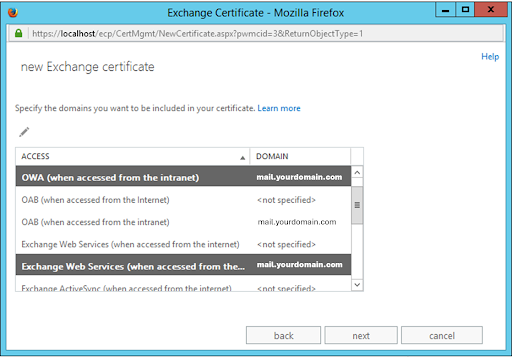
From the list, choose the services that you would like to secure with the certificate using Ctrl+Click.
Important This step will be skipped if you are using a Wildcard certificate.
Configure/Add the names to the certificate request -
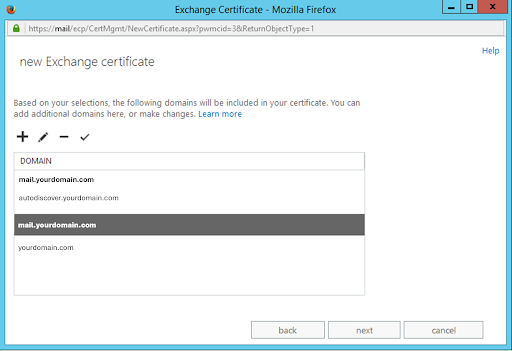
At the next step, there will be a list of domains and subdomains which can be included if you have a multi-domain certificate. You can also add any additional names by using the “+” button. If you have single domain then do not add any additional domain.
Important The server’s name (in our case, it is “mail”) will be added to this list as well. Other different names might also be present in the list. It usually depends on how you completed the previous step. Review all the names and remove the unwanted ones by using the “-” button:
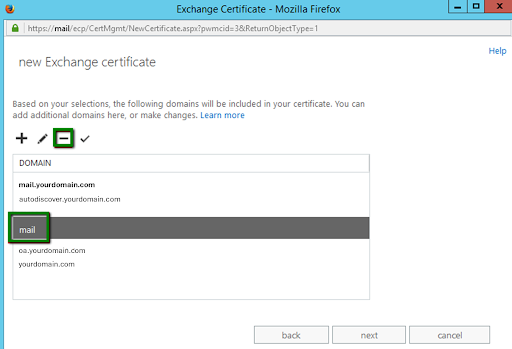
Remove that additional domains which are not required -
Once the list contains all the needed names, Choose the Next button.
-
Fill in the organization details:
Organization name: Enter legal name of your company.
Department name: Leave it blank.
Country/Region name: Select the country from the drop-down list where your organization is located.
City/Locality: Enter city/locality where your organization is located.
State/Province: Enter the full name of your state/province. If there is no state/province, you may enter your city name again.
Important Please make sure you use only alphanumeric characters. Special symbols or letters in the native language (! @ # $ % ^ ( ) ~ ? > etc.) are not allowed when filling in the information.
-
At the next step, you need to enter a path to the existing folder on your computer. The CSR code will be saved to this folder.
Important The CSR code will be saved with .req extensions by default. However, you can rename it with a .txt extension, if required.

-
Choose the Finish button. Your pending certificate request will be displayed in the Certificates menu.
- You have completed your certificate signing request. Now you can open the CSR code on your end with any text editor. Use the contents of the CSR file saved on your end, and copy its full content including the —–BEGIN CERTIFICATE REQUEST—– and —–END CERTIFICATE REQUEST—– tags, and paste it into the SSL configuration page.