This solution will detail the process of installing an SSL certificate for use with Microsoft IAS Radius Server.
a) Make backup copies of your old and new SSL certificates:
- Create a Microsoft Management Console (MMC) Snap-in for managing certificates, as described in solution SO1849.
- Backup the certificate for Microsoft IIS 6, as described in solution SO1707.
b) Delete the old and new SSL certificates from your server.
This step is required in order for the new SSL Certificate to be picked up by IAS, you MUST clear the personal certificate store, reboot the server and then re-import the new certificate from a backup. If you dont complete this step your new certificate will not work.
- With the MMC still open, locate each SSL certificates in Personal > Certificates and delete each one by right-clicking on the certificate in the list and clicking on Delete.
- Restart the server.
c) Reinstall your new SSL certificate on the server.
- Create a Microsoft Management Console (MMC) Snap-in again as you did previously in step a)
- On the right pane, right-Navigate to and click Certificates and select All Tasks > Import (this opens the Certificate Import Wizard.
- Navigate to and click Next
- Browse to the certificate file you saved earlier with the PFX extension
- Navigate to and click Next
- Provide the password used to secure the certificate
- Navigate to and click OK (To export the certificate again from this computer, select Mark the key as exportable)
- Select the option Automatically select the certificate store based on the type of certificate. (This ensures all the certificates in the certification path (Root, Intermediate, and Server) are stored in the proper place).
- Navigate to and click Next
- Navigate to and click Finish
- A message confirms successful import. Navigate to and click OK
If you only have the one certificate imported then your new SSL certificate should now work immediately. Skip down to step g) to test the certificate.
d) Assigning the certificate in Microsoft IAS
If you require multiple certificates installed on the server then you will need to reference the correct SSL certificate in IAS.
- Select Start
- Select Internet Authentication Service
-
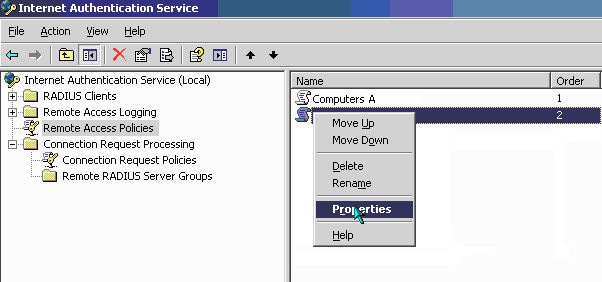
On the Left pane, Select Remote Access Policies

-
On the right pane, Right Navigate to and click the group policy the certificate will be applied to and Navigate to and click Properties
-
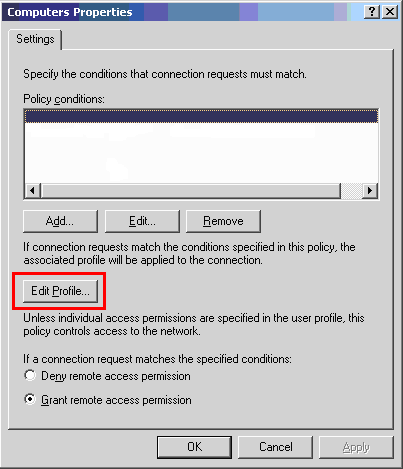
Select the Edit Profile button
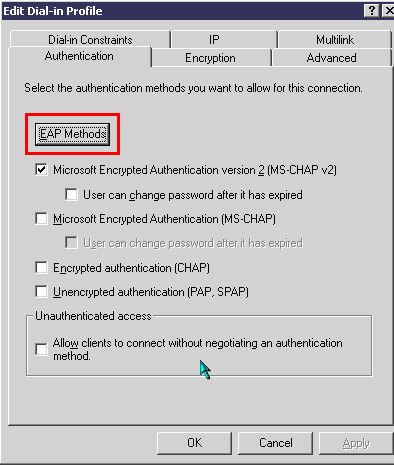
- Select Authentication tab
-
Select EAP Methods button
-
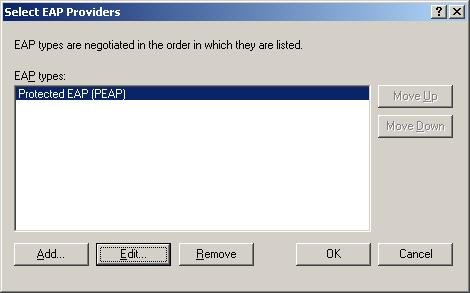
Select EAP Providor and Navigate to and click Edit
-
Select the correct certificate from the drop down list
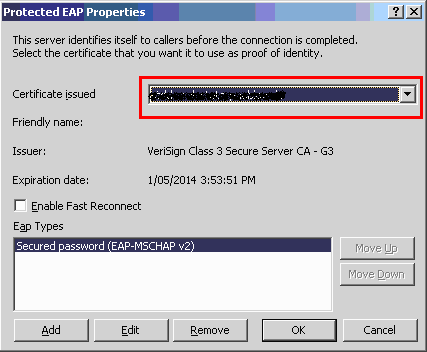
- Navigate to and click OK
e) Restarting the IAS service
- Run the windows Services console from Start -> Control Panel -> Administrative tools -> Services
-
Locate and restart the Internet Authentication Service
f) Testing the new certificate is working
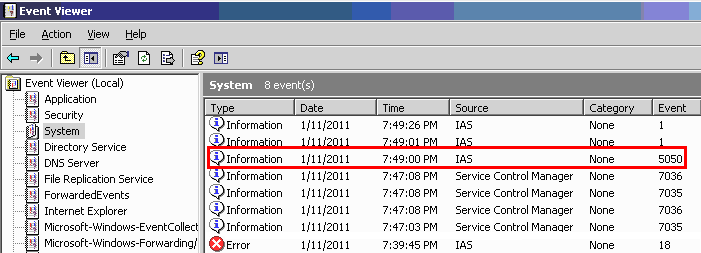
- To check if the service is working with the newly installed certificate, check the Event Viewer logs for successful or failed connections
-
Run the windows Event Viewer console from Start -> Control Panel -> Administrative tools -> Event Viewer

-
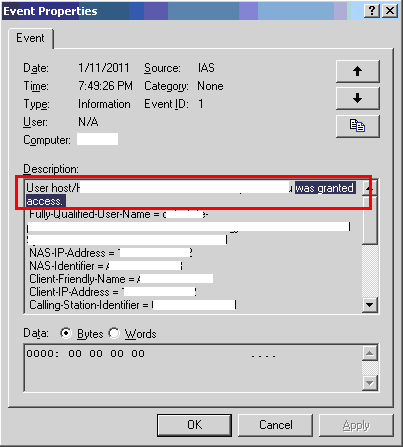
The four event Information from source type Service Control Manager represent a successful restart of the IAS service. After the service restart, you want to look out for successful client connection events and these will typically come through from the source type IAS. Double Select the highlighted event to view the successful connection information:
You have now successfully installed the new SSL certificate and confirmed connections are accepted by the Radius Server.
Further Troubleshooting
In event viewer, for the IAS source, if you are still seeing connections denied access, open the event and scroll to the bottom of the description to find the reason code.
Reason-Code = 48
Reason = The connection attempt did not match any remote access policy.
Check for any policy that may be restricting access during certain hours of the day or night.
- Load up IAS Service
- Select Remote Access Policies
- Right Navigate to and click the policy and select properties
- Check the policy condition i.e. Day-And-Time-Restrictions
Reason-Code = 262
Reason = The supplied message is incomplete. The signature was not verified.
Check that the SSL certificate installed is chaining correctly.
- Ensure Thawte Intermediate CA for your SSL certificate are installed correctly on all domain controllers. The Intermediate CA for your SSL certificate can be located in this solution INFO1384