How to install SSL certificate in Palo Alto Networks
- If you had the option of server type during enrollment and selected Apache or Other you will receive a x509/.cer/.crt/.pem version of your certificate within the email. Alternately you can access your Certificate User Portal by the supplied link in the email to pick up the x509 version of your certificate.
- Copy the SSL certificate and make sure to copy the —–BEGIN CERTIFICATE—– and —–END CERTIFICATE—– header and footer. Ensure there are no white spaces, extra line breaks or additional characters.
- Use a plain text editor such as Notepad, paste the content of the certificate.
- If your intermediate CA certificate for your product is not in the body of the email you can access your Intermediate CA also in a link within that email. Copy and paste the contents of your Intermediate CA under your SSL Certificate. It should look something like this…
—–BEGIN CERTIFICATE—–
{SSL Certificate encoded data}
—–END CERTIFICATE—–
—–BEGIN CERTIFICATE—–
{Intermediate CA encoded data}
—–END CERTIFICATE—-
Note: You may only ever receive one Intermediate CA certificate depending on the CA SSL Certificate provider. If you receive more than one intermediate place the “second” (also known as chain or crossed signed) intermediate under the first. - Save your Notepad file with your SSL Certificate and its Intermediate CA with any naming you like with a .cer extension.
Note: The name of the file cannot contain spaces, as this may cause the import to fail.
Importing your SSL Certificate:
- Log into your Palo Alto Network system.
- Access Device > Certificate Management > Certificates.
- When importing your SSL certificate you must use the same Certificate Name used during CSR creation. You will see the status of the CSR request marked as Pending.
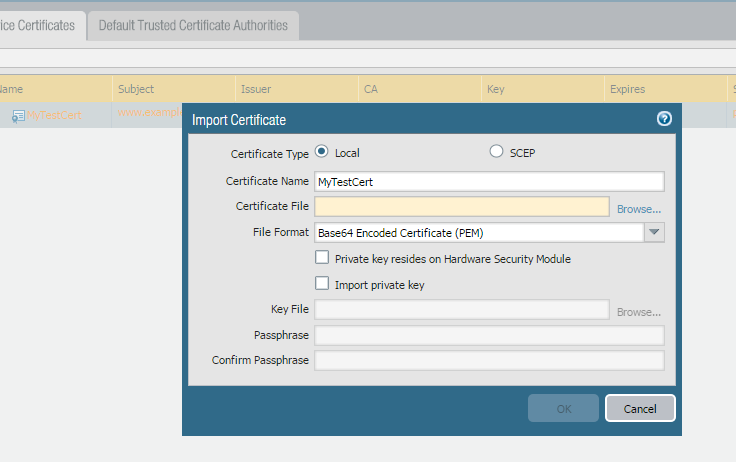
- Choose the Import option at the bottom of the screen.

- In the Import Certificate window, type the name of the pending certificate. It must match exactly.
- Choose browse to specify the name and path of the .cer SSL Certificate file you created.
Note: Do not Choose the Import Private Key check box. The private key is already on the firewall. - Choose ok.
- The SSL Certificate will now appear as valid and will be ready for any function you desire on the Palo Alto Network system.
